Migrating from Ghost to Substack by Migrating from Ghost to WordPress
Here's how I managed to migrate my site from Ghost to Substack by partly migrating it from Ghost to WordPress.


It’s been a tough few months for Mania Inc. as we got into headwinds with Ghost CMS over payments for the Ghost Pro hosting service. My site was unfortunately, taken offline as a result, and as per the circumstances at the time, I couldn’t come up with the fees to see it come back online. At the same time, I had been mulling about bringing Mania Inc. over to Substack but wasn’t sure. These events then incentivized me to move my entire 650+ posts to Substack and here’s how I did it.
Migrating from Ghost to Substack
It was time to pack up and leave Ghost. Problem is, my site was offline and the most recent export I had made from within the Ghost dashboard was from June 6th 2023, even as my site was taken offline on June 29th. As such, when I came to import my site on Substack in Settings » Import, I couldn’t call on the site first via the URL to then be taken to where I’d upload my .json export.
Saved by RSS
Luckily, I had created an RSS feed via Google Feed Burner for my site and I was able to use that feed’s url on Substack which then took me to the upload part where I could upload my .json export from Ghost. For some reason, the June 6th backup wasn’t uploading, forcing me to upload an earlier backup with fewer posts; about 536 to be exact. I still needed to find a way to bring the rest of the posts over to Substack and here’s where WordPress came in.
Migrating from Ghost to WordPress
I realized that I could use the .json export of my posts and upload it to a new/blank WordPress site and then migrate the posts I needed from WordPress to Substack. Here’s how I did it.
Finding a WordPress Host
I needed a new and blank WordPress site to effect my import. I tried one of the free WordPress hosts but was quickly disappointed by bandwidth limits and overall slowness. As such, I opted for a Cloudways plan that would ensure that I got a robust WordPress site that I could import my Ghost export file to, and then export the posts to Substack. Cloudways offers flexible plans and I was able to quickly open a new server and install a new WordPress app on it.
PS: You can get a Cloudways plan via our link and also by using the coupon code "MANIAINC". Dreamhost would also serve the purpose. Get it here.*
*We may earn a commission but you’ll get a discount.
How to Import a Ghost CMS .json Export File to WordPress
I needed a plugin to import posts from my .json export file from Ghost and to upload them into WordPress. After some research, I came accross the ‘Ghost Importer’ plugin which was a one-click solution to import posts from a .json Ghost backup file into WP.
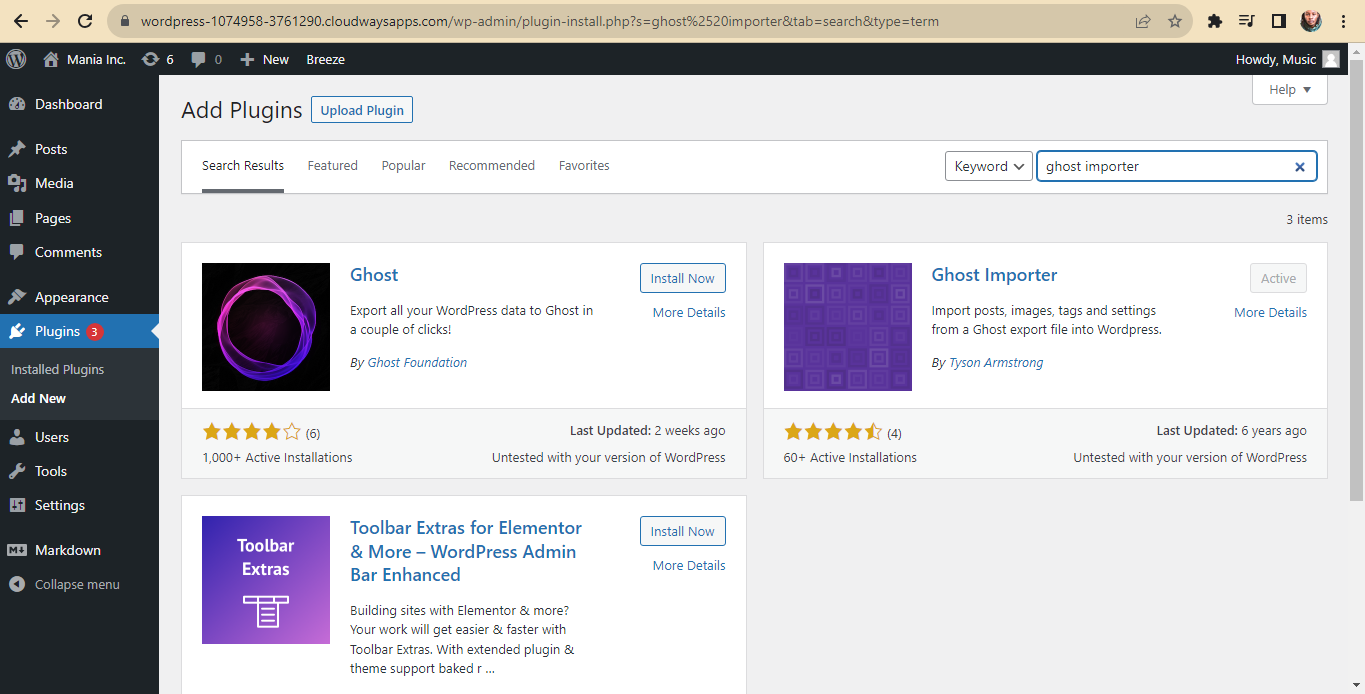
I then went about installing the plugin to WP and after activating it, navigated to its UI via Tools » Ghost Importer.

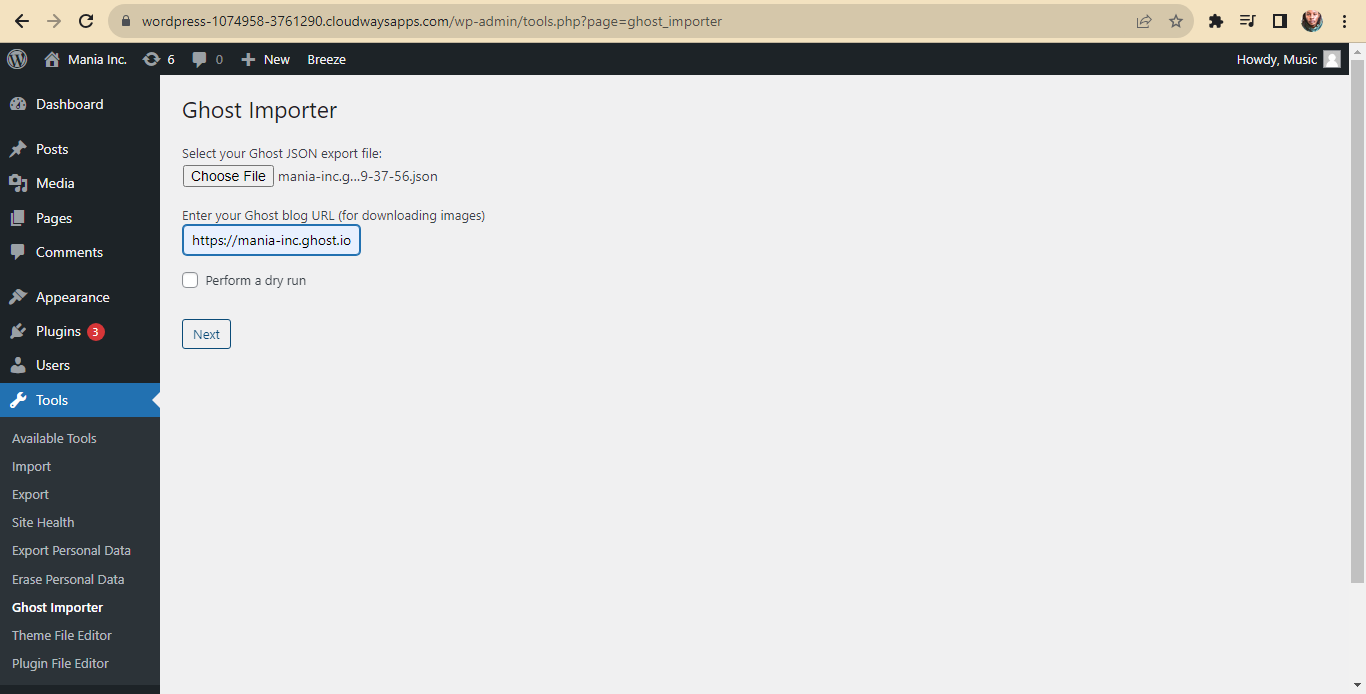
There, the plugin asked for the Ghost site’s URL, which I didn’t have, as my site had been taken off the web. The plugin says that it needs the URL to import the images from the Ghost site.
Above, I then found a box where I could upload my .json export file. I left the site URL part blank and did not tick ‘Perform a dry run’ and uploaded my export file from Ghost and clicked ‘Import’.
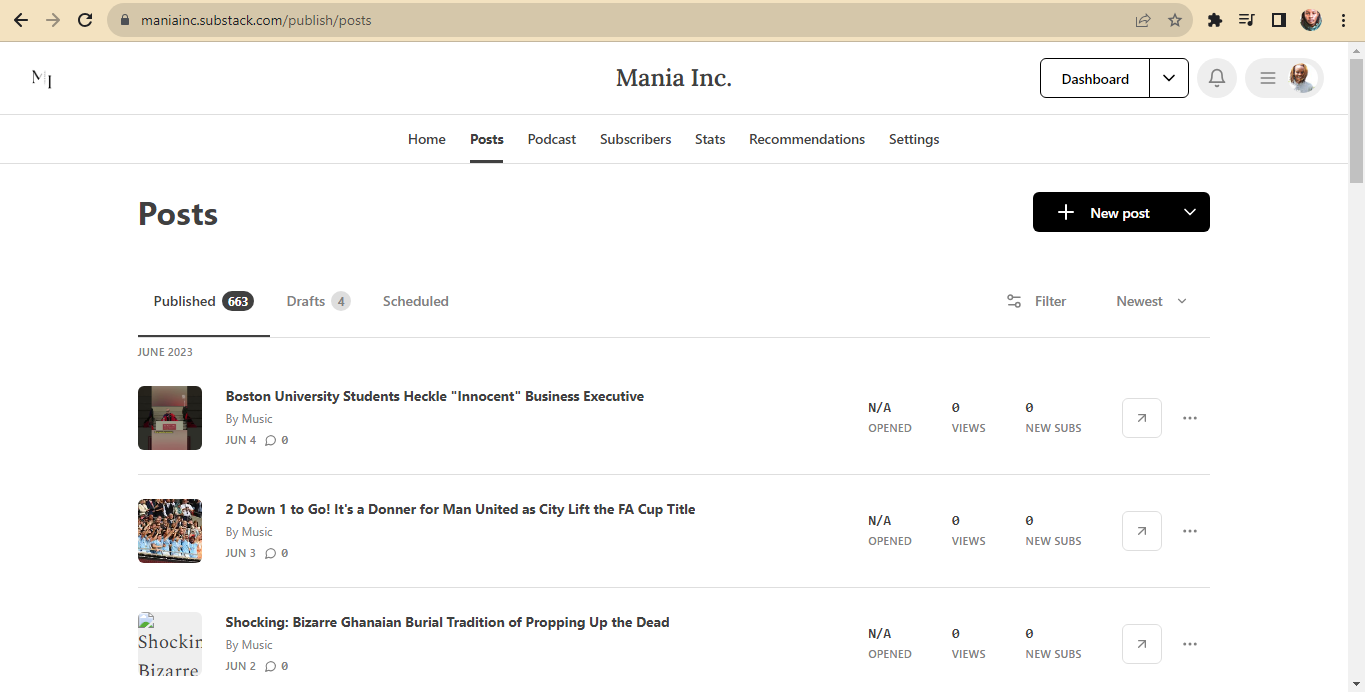
After a few minutes or so, the plugin told me that the import was successful and that it had imported 663 posts.
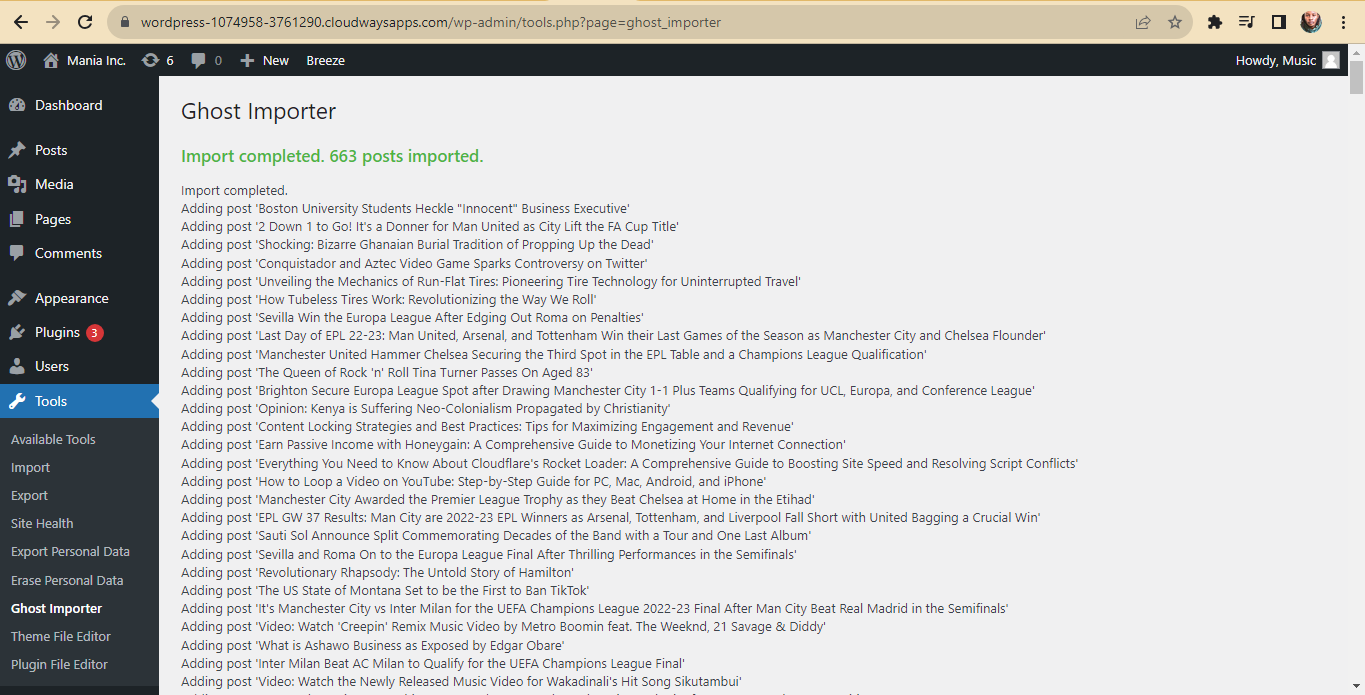
This was great but I only needed less than 150 posts as the rest I had imported to Substack already.
To ensure that I only got the posts I needed ready for the move to Substack, I went about deleting the 536 I had already managed to import to Substack and leave only the rest that I needed to move over.
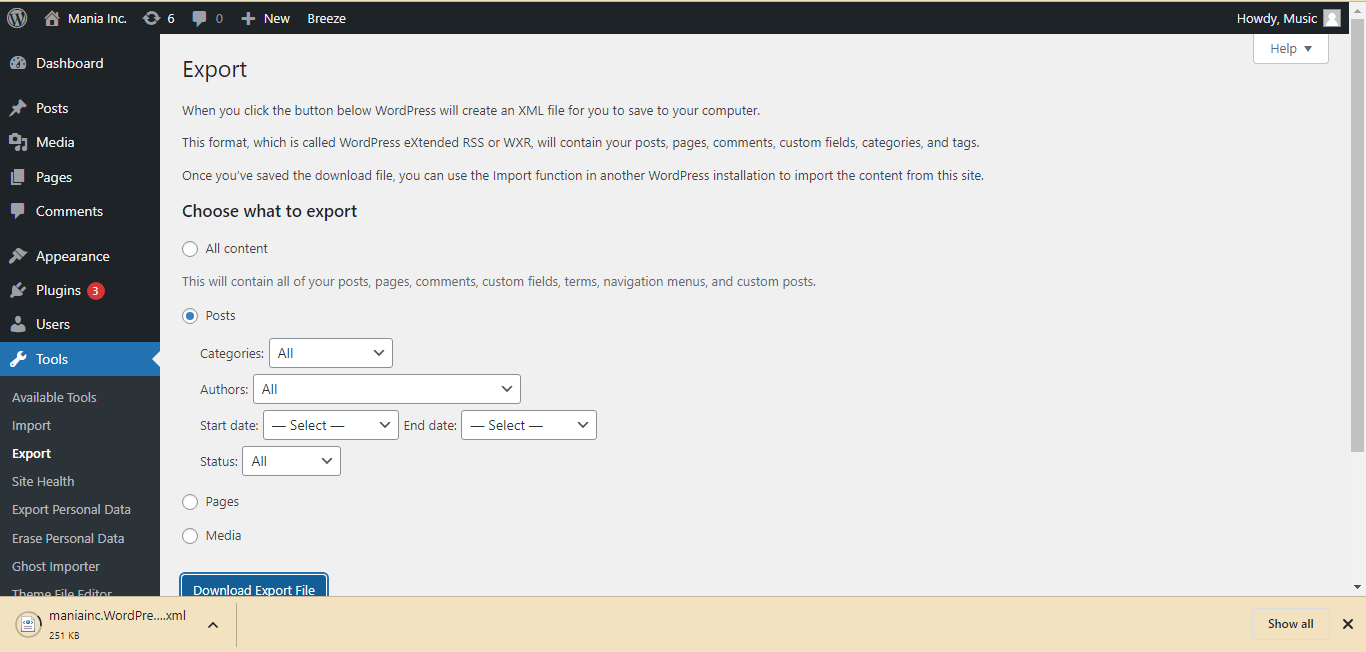
I quickly deleted the 536 posts and left only 127 that I needed to move over to Substack. After doing this, I then went to Tools » Export and exported by WordPress site, downloading a .xml export of my WordPress site.

After doing so, I went back to Settings » Import on Substack and entered the WordPress app’s url, that led me on to the upload part.

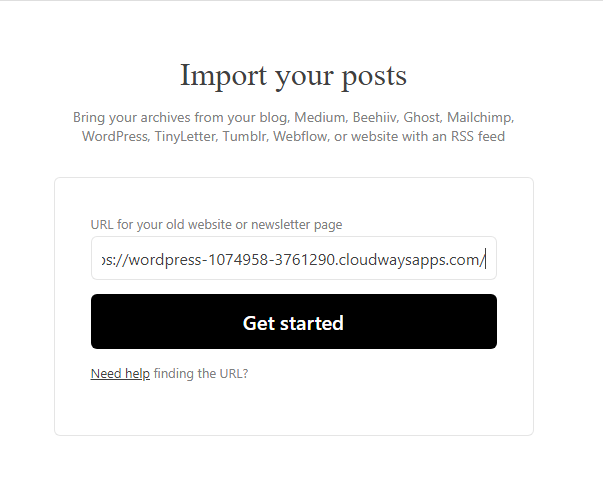
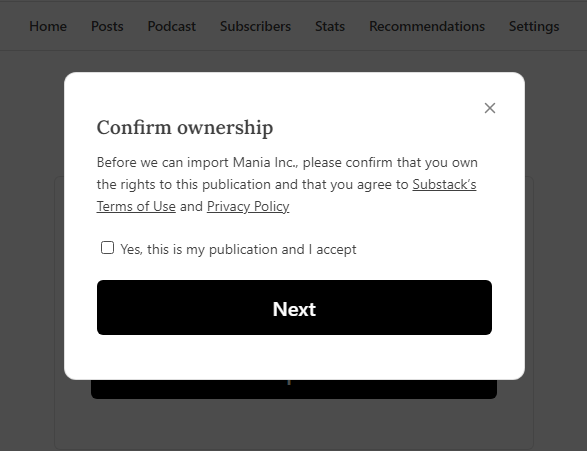
Here, I uploaded the .xml export I got from WordPress and after a moment, Substack asked me to confirm that I am the owner of the site which I did.
My 127 posts were then imported into Substack successfully.
Post-Import Editing
After importing my now 663 posts to Substack, I realized that most posts had most of their pictures broken, especially the images I had uploaded to my Ghost site. The reason for this was that my site was offline while I undertook the import to Substack and therefore, Substack was unable to fetch the images as the image links were broken, prompting an “image not found” error for most images.
The images that were okay were the ones I had sourced from Unsplash within the Ghost editor. These were readily available for Substack to fetch, as Unsplash is still online and wasn’t affected after my site was taken offline. There were also images available here and there within posts, with most broken and only showing the image’s alt text as I had previously written in the alt text box in Ghost.
For the posts I imported from WordPress, all of the ‘Featured Images’ were unavailable as I had not provided a link in Ghost Importer when importing my .json Ghost export file during the import to WordPress. Some of the images within posts were, however, present in the imported posts.
Recovering Lost Images
To recover the lost images, I had luckily gotten a link to download the backup of my Ghost site from their support staff. I therefore, had a 600+ MB backup of my site that included a folder with images.
To know which image to upload where, I would go on to open two windows/tabs of a certain post on Substack and on one press ‘Edit Post’ on the 3-dot dropdown menu at the top of the post, with the other window as a reference guide to where the post’s images are supposed to be.
To fetch the filename of the broken images as was in the Ghost database, I would scroll over the broken post placeholder and see the filename of the image as the end part of its URL. I would then open ‘File Explorer’ on my PC with the images folder open (from the backup I downloaded that was provided by Ghost Support). I could then go on to search for that filename in that folder, and see the picture I need to upload to that particular post.
What I Noted: Broken Elements After Import
Broken Images
For the broken images within posts i.e. except the featured image (also broken), when an image broke, it would often take off a chunk of text below where the image is in the Substack editor screen and therefore, I had to use the second window of the post (as rendered in the Substack front-end) to see if there was any text that had been cut off in the Editor screen.
Ghost Image Compression
In the ‘images’ folder from the backup Ghost sent me, I also realized that there were different version of each image, with the original one having ‘_o’ appended at the end of its filename. What this suggests is that Ghost would use some form of compression for each image uploaded within the Ghost editor, and keep both the original and compressed file.
I opted to go with the compressed images, as these were smaller in size but still had somewhat good quality. The rationale for this is that I would try to benefit from this compression of images and ensure the images I upload to Substack are already compressed and have smaller file sizes to help in ensuring that huge images do not slow down my Substack. (Not to say that they would; but better to be safe than sorry :)
Broken Embeds
Embeds that I had included in my posts in Ghost were also broken as they linked to posts that were only available in my Ghost site, denoted with a /GHOST_URL/ within the URL.As such, I needed to remove the links (which appeared as worded links in the Substack editor) and go on to paste the Substack link to that post, which embedded the posts from within Substack.
Author Name
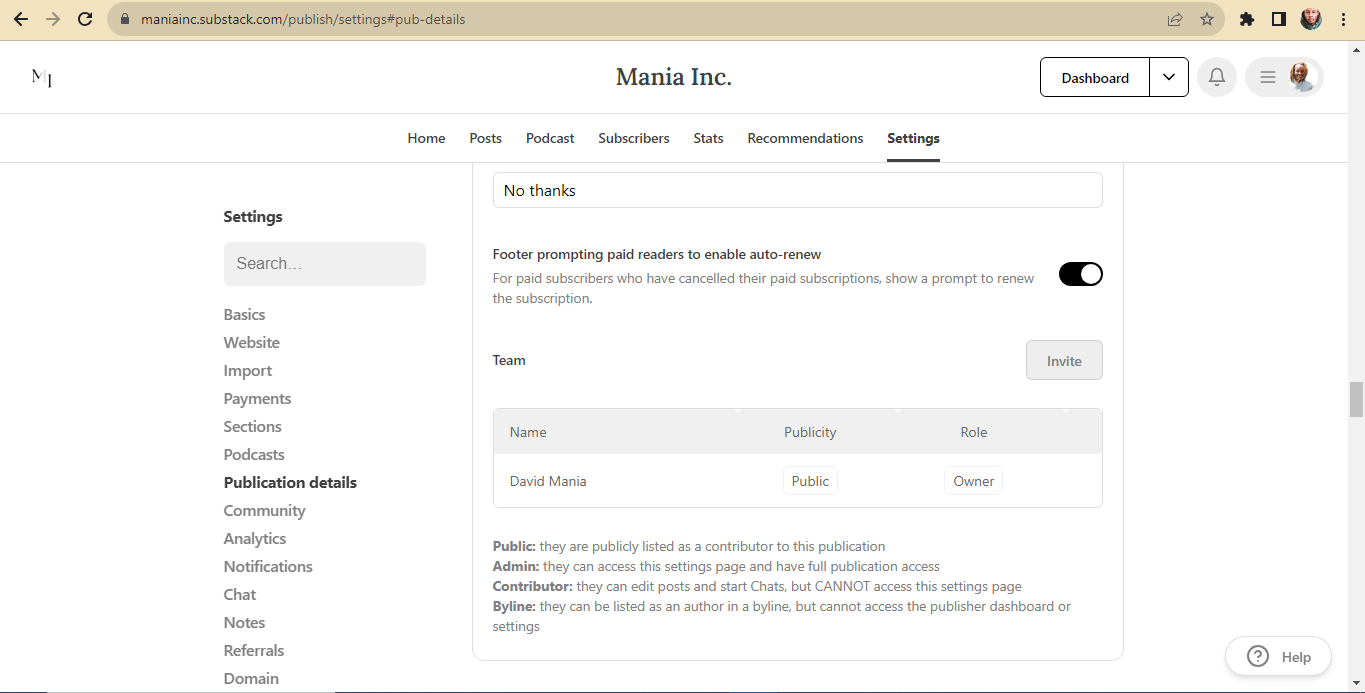
Another thing I noted is that when I imported the posts from WordPress to Substack, the posts’ author was the name of the WordPress admin for that site, which at the time was ‘Music’ i.e, the name of the owner of that WordPress site as set within the WP dashboard. Therefore, for the 127 posts I had imported to Substack via WordPress, I needed to remove the ‘Music’ author name in the byline and replace it with my name. I did this in the Substack Editor, where I removed the ‘Music’ author name and clicked on ‘Choose Author’ and my name, denoted ‘Owner’ was available for me to select.
I also went to Settings » Publication Details and removed the ‘Music’ team member (author). You can also do this if you note a disparity with the imported authors and the ones you have on Substack.
To be on the safe side, ensure that you edit your name in the WordPress Dashboard before exporting your posts and importing them to Substack.
Missing Subtitles
‘Subtitles’, which are the little summaries that appear below the post’s heading in Substack, were also missing for the 127 posts I migrated from WordPress to Substack; and I also had to replace those.
Missing YouTube Embeds
YouTube embeds were also missing in the Substack editor but could be seen on the unedited post’s front-end. As such, it was just a matter of simply copying the link to the video in my second (reference) window/tab of the post and noting where it was and then pasting it. This way, it could appear again after editing and not get lost as it would have had I not done this.
Broken Tweets and Instagram Embeds
Within Substack, Tweets that I had embedded in Ghost only appeared as Block Quotes in Substack and also in the editor. The same was true for Instagram posts and I chose to leave these as they were and now they can be seen as Block Quote text, with links to the posts in both the Substack frontend and backend.
Block quotes look like this sentence and can be created in the Substack Editor.

Broken Featured Image and Previews
Most of the posts I imported to Substack had their feature images broken and I had to replace these. To ensure that post previews, which were also broken, showed the images I had now uploaded, I went to Substack Editor » Continue » Social Preview and selected the new image. The social preview also acts the “thumbnail” or the post preview image and this sorted both.
URLs Retained
The good thing, however, is all my posts retained their url i.e, the end part of it. This means that instead of https://maniainc.com/post-url they were now https://maniainc.substack.com/p/post-url.. note the /p/ which is part of the standard post url for all substacks i.e subdomain.substack.com/p/post-url.

Redirecting Ghost Post URLs to Matching Substack Post URLs
To ensure that all my previous Ghost URLs for posts redirected to the particular posts on Substack, I leveraged Cloudflare’s Page Rules to help create dynamic URLs via wildcards. I went to Cloudflare Dashboard » Rules » Create a Page Rule and input the following.
In the URL box I input *.maniainc.com/*
For the Setting I selected ‘Forward URL’ and Status Code ‘302 - Temporary Redirect’
For the destination Url, I input https://maniainc.substack.com/$1/$2
I also selected Priority as ‘First’ meaning that this rule is the first to trigger in Cloudflare Rules. You can also do this by dragging the rule to be the first in Page Rules.
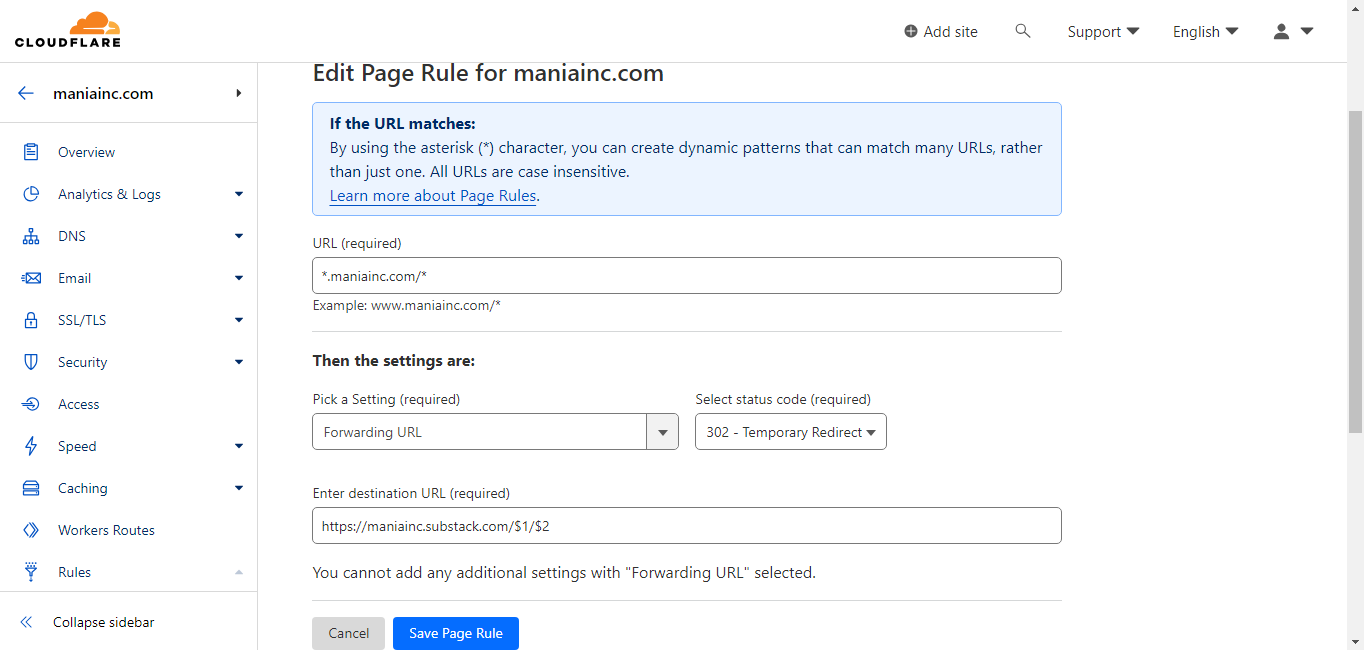
By doing this, I essentially told Cloudflare that for any URL with a matching path after the main domain name and first /, it should redirect it to my Substack URL and look for two wildcard matches denoted $1 and $2 which are glob patterns for wildcards. For in-depth understanding, read more about referencing wildcard matches on Cloudflare.
Long story short, any Ghost URL that points to a post now redirects to that particular post in Substack as the first glob ($1) considers Substack’s /p/ url part for every pattern and then the second glob ($2) considers the matching part of the link which is the last part of the post url. As such, maniainc.com/post-url now redirects to maniainc.substack.com/p/post-url. Remember to replace maniainc.com and maniainc.substack.com with the actual domain name of your site and your Substack subdomain name respectively.
Please Note:
- I already have rules in Cloudflare that point www.maniainc.com to maniainc.com and one that redirects maniainc.com to maniainc.substack.com.
- I had also added a custom domain in Ghost which was maniainc.com and therefore, I am not using my Ghost URL which is usually sub-domain.ghost.io. If you hadn’t, you can use your Ghost url in place of the custom domain to create the redirects and for the purposes of this entire guide.
- This approach may not work for internal links within the imported posts as they had already had /GHOST_URL/ appended within them by Ghost as noted earlier.
Editing All Imported Posts
I then repeated the process of opening two windows for each post that I saw had broken images within the body of the posts, replacing said images and recovering any text that wasn’t showing in the editor that had been “chunked” away. I also went on to replace any internal links I had within the posts, replacing them with Substack links to those posts.
Restricting Access to Paid Subscribers Only in Substack
I also included the Paywall marker to show what part of the post would only be available to Paid Subscribers. You can do this by going to Substack Editor » More and choosing ‘$ Paywall’ in the drop down menu.
Categorizing Imported Posts
I also choose to introduce Sections and categorize my posts in a way that users can choose to only receive emails regarding only those posts that are in a particular section. Sections are essentially categories in Substacks and readers can choose to only receive emails on posts in particular sections.
How to Add New Sections in Substack
You can add a new section by going to Settings » Sections in Substack and you can put a post in a particular section by going to Edit Post and then choosing a section from the dropdown menu just above the post title or by going to Continue » This post belongs to.. and choosing a section.
A List of all the Edits Made
Here’s the entire list of the edits I needed to make to retain my posts as they were on Ghost:
- Replace broken images.
- Recover unrendered text in the Substack editor that had been chunked off.
- Edit Author where necessary.
- Enter a Subtitle where it’s missing.
- Choose a section for the post.
- Replace broken embeds.
- Replace missing YouTube embeds.
- Introduce the $ Paywall marker.
- Replace the Social Preview Image.
Relief
After two to three days of intense editing, as I had 663 posts to edit, I finally managed to edit all my posts and ensure that I got the import as robust as it could be. For the posts imported from WordPress that had no featured images, I choose to leave them as such, as Substack will automatically pick the first image in a post to be the social preview and or thumbnail for the image. All I had to do was go to Continue in the Substack Editor and choose an image from within the post to be my social preview image.
Customizing my Substack Site
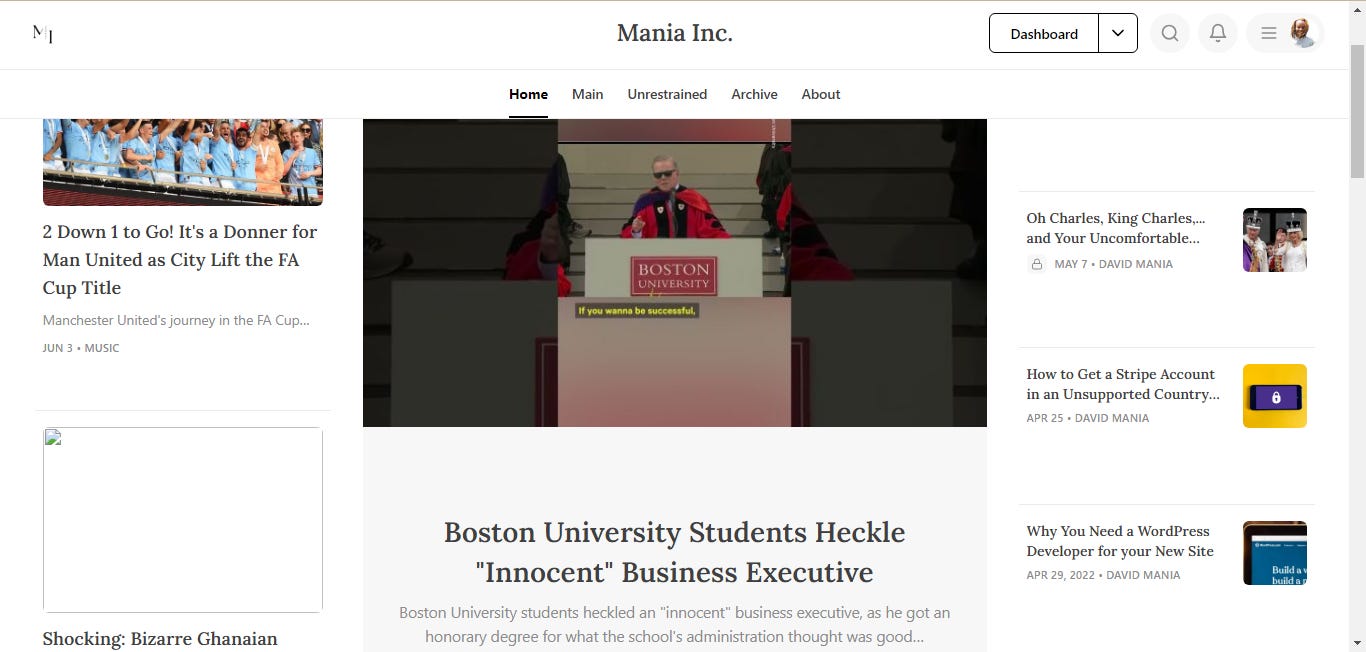
I then went about customizing the look of my Substack site, which I did by going to Settings » Website » Site Design. I am super happy with how the move turned out, albeit having to put in some work to ensure it was as smooth as possible. The site I moved is this site you are reading: https://maniainc.com and I am elated to be on Substack.
I hope this post has helped you migrate from Ghost to Substack via or even from WordPress to Substack.
» This post is free and if you liked it, consider subscribing to this website and the ‘Developers’ newsletter in particular.«
You can also support us on Patreon or buy us a coffee via PayPal. Thanks.